
First, let's define what normalization is and what is it for? If we use technical terms, it means bringing the sound level in the file to normal values. It sounds unclear, what are normal levels and what are they measured in? Now I'll rephrase the definition - normalization is the equalization of volume between individual audio files. You've probably noticed that the volume levels of songs from the same album don't differ, but if you mix different tracks in a playlist, there's a noticeable jump in volume between them. Even more noticeable is the volume jump during commercial breaks in TV programs. They could definitely use normalization.
1 Peak Normalization
This is the simplest and most obvious way, with the point being to make it as loud as possible (0 dBFS) without changing its dynamic range. The maximum level of existing samples is calculated, and then all of them are amplified by the same value. People often peak normalize their audio just so they can see the waveforms more clearly on the screen. However, peak normalization to 0 dBFS is a very bad idea for any recordings you intend to edit. It may not clipping on its own, but the results of applying a filter can be unpredictable. Use lower values, no higher than -3dB.

The problem with this method is that the human ear has a non-linear response, and individual peaks prevent amplification of the quieter parts of the audio recording. And while the problem of peaks can be solved by using a Limiter, the problem of human perception still remains.
2 Loudness normalization
This type of normalization calculates average amplitude values and reduces them to the levels recommended by the broadcast standards. LUFS, which stands for Loudness Units relative to Full Scale, is used to measure loudness. It is designed with psychoacoustics in mind, where the volume of sound at different frequencies is perceived differently. If that sounds complicated, it just means that LUFS are the latest and most precise way to measure loudness in audio. No need to look for converters for this parameter, just as with peak normalization the units of measurement here are decibels.
3 How to normalize an audio track
For a long time, audio normalization required decoding, processing and subsequent encoding. Thus, artifacts from audio transcoding were added to the distortions introduced by normalization. The first to solve this problem was ReplayGain, which did not change the file itself, but simply analyzed it and stored the information for playback in the metadata. This method of non-destructive processing is widespread on Linux, but not so common on other operating systems. For example, Apple uses Sound Check for its iTunes player. As ReplayGain is limited to 2 channels, R128 from the European Broadcasting Union is an increasingly common alternative.
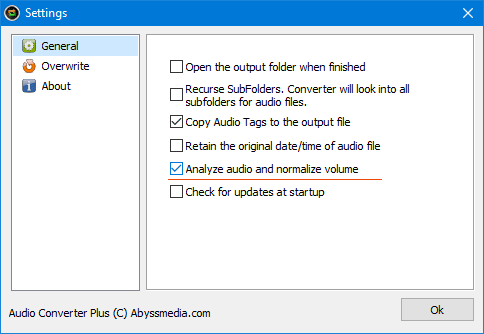
Since our company develops software for sound conversion and editing, the problem of recompression does not affect our tools. If you have already decided to convert an audio file, you can apply lossless normalization to it. This option is available in our audio converter.
4 Advanced Normalization
For more advanced normalization techniques normalizers and analyzers are not enough. You will need to use a full-featured audio editor.

Although normalization in most programs is performed in one click, the result is not always satisfactory. As I said above, the main disturbance will be individual peaks. Clipping audio signal during normalization introduces noticeable distortions in the sound of some musical instruments. Applying a Limiter can save the situation, but if there are too many individual peaks, you probably made a mistake at the stage of recording. It is better to eliminate the cause of the peaks instead of searching for forced solutions.

In addition, it is necessary to take into account the dynamic range, i.e. the difference between the loudest and the quietest parts of the phonogram. The optimal solution to this problem is to use Dynamic Compressor pre-processing. This algorithm allows you to attenuate the loudest parts of the recording and equalize the dynamic range to the desired values. This means that the voice of your interlocutor a little farther away from the microphone will sound as loud as yours. We recommend activating the Look Ahead option for a smoother amplitude change.
Well, now your soundtrack looks perfect and you can apply normalization. For podcasts, you can choose the default value of -16 LUFS. For music, Spotify and Amazon Music currently recommend -14 LUFS. Just set this parameter and the editor will do everything for you.

5 Summary
Now you can open in the editor your original track, the track after normalization and the last track made with the advanced technique. The difference is visible to the naked eye. I'm sure that your listeners will appreciate your efforts.
You may say that this is a waste of time. Modern audio editors use 32-bit floating-point samples, so they are not afraid of overloads. This is partly true, but you may encounter signal clipping in filters and sound effects during sound processing. In any case, you will need to apply normalization at the final stage.