
Both of these formats are familiar to fans of quality audio. The vast majority of audio formats use PCM encoding, while DSD stands apart. If you have already read our article on the differences between DSD and PCM, then you already know the main differences between DSD and WAV. In this respect, FLAC is no different from WAV. The formats differ so much that the conversion between them is a non-trivial task. DSD encodes music using pulse-density modulation, a sequence of single-bit values with a huge sampling rate.
Does the DSF to FLAC conversion make sense?
Let us once again recall the main differences of DSD. First of all, all its advantages are revealed on equipment with single-bit delta-sigma converters. 99% of modern DAC's use multi-bit D/A converters because they provide better performance than 1-bit converters - even those who advertise "native" DSD compatibility. So, at some point, the 1-bit DSD stream must be converted to multi-bit for all of those DAC's. Unfortunately, the internal conversion is usually far from being perfect.

It turns out that this format is worthy of SACD and makes absolutely no sense for PC storage. Why? Of course due to its exorbitant size. On average, a DSD file will be four times bigger than a similar quality FLAC file. It would also be worth mentioning that it is impossible to edit DSD. There are no such editors, and those that can edit DSD files simply convert them to an intermediate PCM format. You can say that you can not edit high resolution audio in order not to lose quality. Not at all, lossless compression formats allows you to edit audio without losing a single bit of quality. Of course, we are not talking about effects, but about the basic operations of deleting, copying, pasting and cutting into tracks. Despite the hype, there are virtually no pure DSD recordings available to listeners. Most DSD recordings are actually edited, mixed and mastered in 5-bit PCM (aka Wide-DSD). The marketing hype around DSD quality that you hear rarely exists anywhere else but in theory. That's the secret.
Which DSD converter should I choose?
Realtime hardware digital-oversampling filter can have computing limitation due to restricted resources on chip. Software conversion has great advantages in this aspect. Even with a weak computer you can spend time for a quality conversion to listen to music on any player. The key to success is a quality DSD demodulator and linear phase resampler. Both of these components can be found in Audio Converter Plus. To avoid conversion artefacts and sigma-delta modulation noise supression it uses 64-bit computing. Instead of the usual hi-res audio frequency of 96KHz the resampler uses 88.2KHz, it is very important that the down- (or up-) sampled rate be an even division (or multiplication) of the original.

Key features of Audio Converter Plus
- High-quality DSP module that processes audio with 32-bit precision
- Supports a large number of audio formats
- Supports hi-res audio up to 192 kHz
- Optimization for multi-core CPUs with modern SIMD instruction sets
Now let's go through the process of converting a DSF file in Audio Converter Plus step by step. Of course, for most readers this is quite a routine activity. Nevertheless, if you don't want to waste your time studying the instructions and failing, we will describe the process for you.
1 Install DSD Converter
If you have already installed programs on your computer, this process will not cause you any problems. Download Audio Converter Plus from the link above. The installer will not only install the converter, but also integrate it into the Explorer menu. You can start the program from the Desktop or from the "Start" menu. After that you will see the main window of the program.
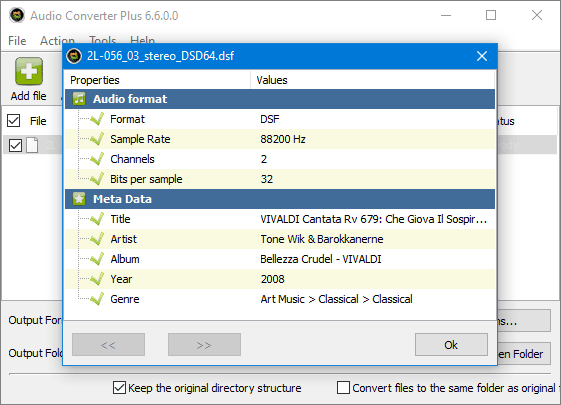
2 Add DSF Files to the conversion list
You can add DSF files to the program window by dragging them from the Explorer window or using the "Add File" and "Add Folder" buttons. If the "Recurse subfolders" option is selected in the program settings, files from the selected folder and all subdirectories will be added.
3 Select a folder to store audio recordings
At the bottom of the main program window you can see the "Output folder" option. Click the "Browse" button to select the output folder where the FLAC files will be placed. In addition, you can use the same folder as the original DFF audio and keep the original directory structure.
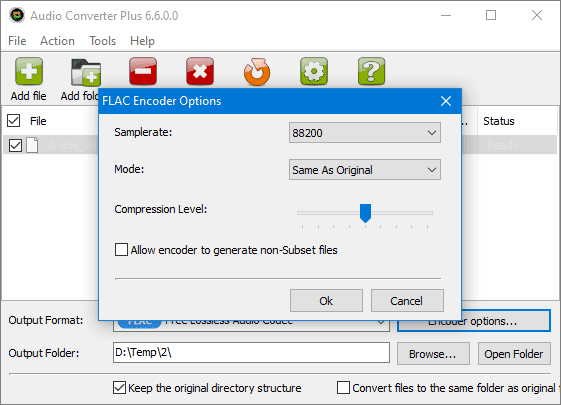
4 Set the output audio format
Select FLAC encoder from dropdown list and click the "Encoder options". Use the "Same as original" choices to keep original audio format. "Compression" slider lets you choose between compression speed and volume of the output FLAC file.
5 Start Converting
Click the orange "Convert" button to start the conversion, then you will see a window displaying the current progress. You can safely minimize the window to the background, when the work is finished, the converter will flash in the taskbar.
It's done. Now you can evaluate the quality of the conversion by comparing the sound of the original DSD file and its FLAC version. I personally could not notice the difference, but audiophiles may have a different opinion, not necessarily objective. In any case, all the advantages of FLAC, described in the introduction, will stay with you forever.