How to Edit Individual Channels with WaveCut Audio Editor

In some cases you may need to edit individual channels of a stereo file or a multichannel audio track. Most often this is due to different volume levels. The same happens when restoring recordings - individual noise or clicks occur on different audio tracks. Using advanced sound effects for individual tracks is not recommended because of possible phase distortion. The program WaveCut Audio Editor allows you to do this quickly and easily. The unique thing about this editor is that you can change the duration of each channel individually.
1 Download and install WaveCut Audio Editor
Click the big button below this text to download. Once the download is complete, run the file wavecut.exe and follow the instructions of the installation wizard.

2 Open the input audio file
To open the audio file you are about to edit, click the Open button on the toolbar and in the Windows Explorer window that opens, select the desired audio file and click Open. Alternatively, you can use the Explorer context menu or you can drag and drop the file onto the editor window.

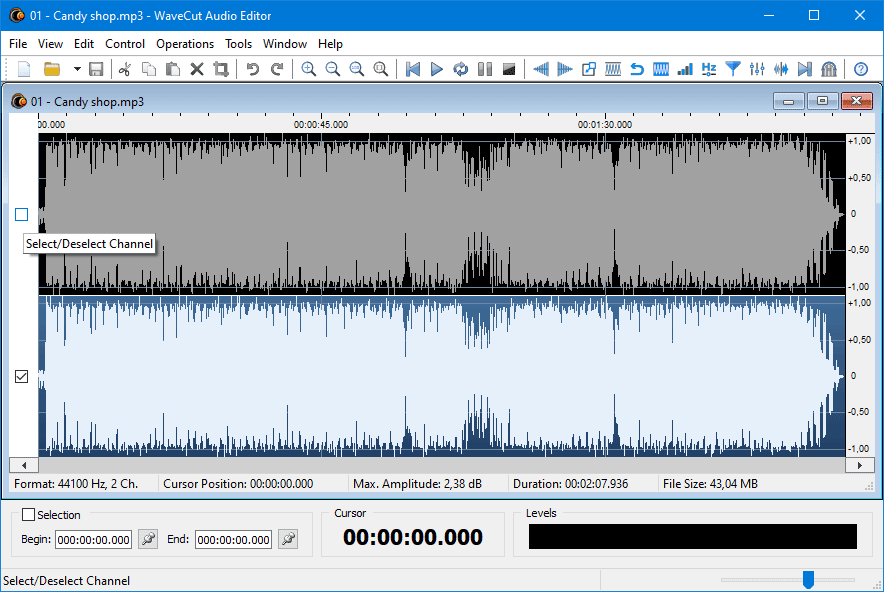
3 Select channels for editing
Use the checkboxes on the left side of the editor window to select the active channels. Inactive channels will be grayed out.
4 Edit the selected channel
You can perform any operation either on the whole on an individual channel or on its individual sections. Selecting sections is possible in several ways, but most often it is done with the mouse.
When pasting a previously copied section, the existing sound may be replaced, mixed or extended by the section, depending on the pasting option selected. The total duration of the file may change in this case. If you insert a stereo sound into one channel, it will be downmixed to mono.
If you use the Cut, Delete or Trim to Selection options, they will be applied to the active channels only, the other channels will remain unchanged or silence will be added to them to equalize the length.

5 Apply the effect to the selected channel
Apply effects to individual channels in the same way as to an entire file. Open the effect properties window, adjust the parameters and use the preview function. If you are satisfied with the result, click Apply to process the sound.
The only effect that cannot be applied to individual channels is Change Audio Format. Resampling is performed on all channels simultaneously. When saving an audio file, the channel selection is also ignored.

6 Save the edited audio file
To save the resulting file, use Ctrl+S shortcut, or the toolbar and main menu items. If you need to change the file name or compression format, use the Save As... menu item.
That's all, the change of the selected channel is successfully completed. You can continue working in the editor using its other functions, which we will tell you about in the new tutorials.
